Framemeister / CARBY


| NES - Nintendo | SNES - Super NES |
| N64 - Nintendo 64 | GCN - GameCube |
| SMS - Sega Master System | Wii |
| Return to My Game Library |
Framemeister Firmware
- ◆ v2.03A (stable for 1080p TVs)
- ◆ v2.04 (required for 4K TVs)
Note: The NES only outputs in
mono, so you may need a mono-to-stereo adapter to get sound from both speakers.
- 1. Plug the NES AC adapter into the power strip and insert a cartridge.
- 2. Plug the Yellow and Red NES cables into the front of the Framemeister (removing the Red cable that may already be there).
- 3. Press the RED power button on the Framemeister remote (green lights indicate turned on).
- 4. Turn on the TV and switch the input to HDMI2 - Game (non-120hz, Standard signal format).
- 5. If you do not see the blue screen, press 1 on the HDMI Switch remote.
- 6. Turn on the NES system.
- 7. Press VIDEO on the Framemeister remote if you only get audio—and no video (i.e., NO_INPUT).
- 8. Press MENU.
- 9. Scroll down to DATA and then press OK.
- 10. Select LOAD and then press OK.
Note: Do not use LOAD_SELECT - 11. Choose one of the following:
01NESOS.BIN = NES 4x vertical scaled, with extended vertical visibility.
02NES4X.BIN = NES 4x vertical scaled. Original 256x240 resolution displayed in a typical CRT screen size.
03NES4L.BIN = NES 4x vertical scaled, with left side masked (SMB3 border).
04NES5X.BIN = NES 5x vertical scaled. Enlarges the picture to fill more of a modern TV. Generally does not look good with NES games.
05NES5L.BIN = NES 5x vertical scaled, with left side masked (SMB3 border). - 12. Press right and then press OK. Scanlines can be turned on or off by pressing the C button on the Framemeister remote.
Note: If the game does not display after 2-3 seconds, and it says “NO_INPUT,” then press VIDEO on the Framemeister remote to confirm input.

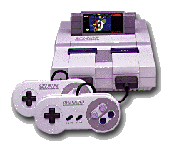
Super Nintendo (SNES)
Reminder: Use the Super Game
Boy adapter to play GB games on the SNES.
- 1. Confirm that the SNES
AC adapter is plugged in. - 2. Press the RED power button on the Framemeister remote (green lights indicate turned on).
- 3. Turn on the TV and switch the input to HDMI2 - Game (non-120hz, Standard signal format).
- 4. If you do not see the blue screen, press 1 on the HDMI Switch remote.
- 5. Ensure the S-Video cable is plugged into the back of the SNES (the same cable works for SNES, N64, and GCN).
- 6. Turn on the SNES system.
- 7. Press SVID on the Framemeister remote if you only get audio—and no video (i.e., NO_INPUT).
- 8. Press MENU.
- 9. Scroll down to DATA and then press OK.
- 10. Select LOAD and then press OK.
Note: Do not use LOAD_SELECT - 11. Choose one of the following:
06SNS4X.BIN = Super NES 4x vertical scaled. Original 256x224 resolution displayed in a typical CRT screen size.
07SNS5X.BIN = Super NES 5x vertical scaled. Enlarges the picture to fill more of a modern TV. Works well with some SNES games.
08SGB7X.BIN = For using the Super Game Boy adapter on the SNES. Super Game Boy adapter for the Super NES 7x vertical scaled. - 12. Press right and then press OK. Scanlines can be turned on or off by pressing the C button on the Framemeister remote.
Note: If the game does not display after 2-3 seconds, and it says “NO_INPUT,” then press SVID on the Framemeister remote to confirm input.

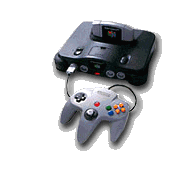
Nintendo 64 (N64)
Note: A few N64 games switch
resolutions between cut scenes and gameplay. The Framemeister does NOT handle these situations well. Examples include Killer Instinct Gold, Perfect Dark, Pokemon Stadium, and Resident Evil 2.
- 1. Confirm that the N64 power cord is plugged into the power strip.
- 2. Press the RED power button on the Framemeister remote (green lights indicate turned on).
- 3. Turn on the TV and switch the input to HDMI2 - Game (non-120hz, Standard signal format).
- 4. If you do not see the blue screen, press 1 on the HDMI Switch remote.
- 5. Ensure the S-Video cable is plugged into the back of the N64 (the same cable works for SNES, N64, and GCN).
- 6. Turn on the N64 system.
- 7. Press SVID on the Framemeister remote if you only get audio—and no video (i.e., NO_INPUT).
- 8. Press MENU.
- 9. Scroll down to DATA and then press OK.
- 10. Select LOAD and then press OK.
Note: Do not use LOAD_SELECT - 11. Choose one of the following:
09N644X.BIN = N64 4x vertical scaled. Original 320x240 resolution displayed in a typical CRT screen size.
10N645X.BIN = N64 5x vertical scaled. Enlarges the picture to fill more of a modern TV.
- 12. Press right and then press OK. Scanlines can be turned on or off by pressing the C button on the Framemeister remote.
Note: If the game does not display after 2-3 seconds, and it says “NO_INPUT,” then press SVID on the Framemeister remote to confirm input.
Reminder: A handful of N64 games had a 16:9 in-game setting for widescreen, including GoldenEye 007, Mission: Impossible, Donkey Kong 64, Perfect Dark, and Banjo-Tooie.
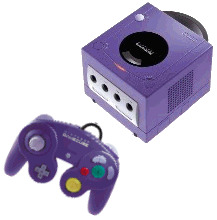


Reminder: The CARBY is in lieu of the expensive GameCube component cable for playing some games in 480p progressive scan mode. It also supports 480i games.
- 1. Insert the disc into the GCN system.
- 2. Turn on the TV and switch the input to HDMI2 - Game (non-120hz, Standard signal format).
- 3. Press 2 on the HDMI Switch remote.
- 4. Hold down the B button on the GameCube controller and power on the GCN system. Continue to hold B during the GameCube boot screen and company logos.
- 5. If done correctly, the message "Display in Progressive Scan mode?" appears with compatible games.
- 6. Select YES to activate the mode.
Note #1: Probably half of your GameCube collection supports 480p, but very few GCN games supported widescreen. By default, CARBY uses your TV’s Aspect Ratio setting, which will enlarge the screen while making the games look decent. However, with some games, you may want to change from 16:9 to 4:3 to see what looks better.
- • For widescreen, press OK on the Insurrection CARBY remote to bring up GCvideo menu. Then check under Other Settings > Display as 16:9 to toggle between On and Off.
Note #2: Technically, the GameCube outputs at a scaled 720x480 with rectangular pixels. (This was the format used for DVDs at the time.) So this is larger display area than a 640x480 resolution.


Note: It’s possible to play non-480p GCN games using the CARBY option, too. In fact, you might not have to deal with Framemeister/soundbar IR interference.
- 1. Insert the disc into the GCN system.
- 2. Press the RED power button on the Framemeister remote (green lights indicate turned on).
- 3. Turn on the TV and switch the input to HDMI2 - Game (non-120hz, Standard signal format).
- 4. If you do not see the blue screen, press 1 on the HDMI Switch remote.
- 5. Ensure the S-Video cable is plugged into the back of the GCN (the same cable works for SNES, N64, and GCN).
- 6. Turn on the GCN system.
- 7. Press SVID on the Framemeister remote if you only get audio—and no video (i.e., NO_INPUT).
- 8. Press MENU.
- 9. Scroll down to DATA and then press OK.
- 10. Select LOAD and then press OK.
Note: Do not use LOAD_SELECT - 11. Choose one of the following:
13GCBIN.BIN = GameCube 480i default mode (640x448) 2x vertical scaled. For 480i resolution games, it may make the text slightly more clear while the backgrounds more interlaced looking.
14GCBPR.BIN = GameCube 480p mode 2x vertical scaled. Generally smooth all around for all GCN games. - 12. Press right and then press OK.
Note: If the game does not display after 2-3 seconds, and it says “NO_INPUT,” then press SVID on the Framemeister remote to confirm input.
There are a few other GameCube-related profiles for the Framemeister (although they may have been made moot by CARBY):
- • 15FZGXWI.BIN = Nintendo GameCube "F-Zero GX" anamorphic widescreen 480i full-stretch scaled
- • 16FZGXWP.BIN = Specially calibrated for F-Zero GX’s 480p progressive scan mode on a 1920x1080 screen
- • 17GBPIN.BIN = Game Boy Player (GameCube peripheral) 480i default mode 2x vertical scaled
- • 18GBPPR.BIN = GCN Game Boy Player 480p mode 2x vertical scaled
For widescreen, on the Framemeister remote, press MENU > ASPECT RATIO to toggle between 16 : 9 and 4 : 3.
Sega Master System (SMS)
- 1. Plug the SMS AC adapter into the power strip.
- 2. Plug the Yellow and Red SMS cables into the front of the Framemeister (removing the Red cable that may already be there).
- 3. Press the RED power button on the Framemeister remote (green lights indicate turned on).
- 4. Turn on the TV and switch the input to HDMI2 - Game (non-120hz, Standard signal format).
- 5. If you do not see the blue screen, press 1 on the HDMI Switch remote.
- 6. Turn on the SMS system.
- 7. Press VIDEO on the Framemeister remote if you only get audio—and no video (i.e., NO_INPUT).
- 8. Press MENU.
- 9. Scroll down to DATA and then press OK.
- 10. Select LOAD and then press OK.
Note: Do not use LOAD_SELECT - 11. Choose one of the following:
32SMSP5X.BIN = Enlarges the picture to fill more of a modern TV. Generally does not look good with SMS games.
31SMSP4X.BIN = Original 256 x 240 resolution displayed in a typical CRT screen size. - 12. Press right and then press OK. Scanlines can be turned on or off by pressing the C button on the Framemeister remote.
Note: If the game does not display after 2-3 seconds, and it says “NO_INPUT,” then press VIDEO on the Framemeister remote to confirm input.

Note: The YPbPr component video connectors
(G, B, R) from the Wii component cable need to plug into the corresponding colors on the D-Terminal to Component Adapter Cable (Female), which plugs into the back of the Framemeister. The Y and R component audio connectors also plug into the back.
- 1. Press the RED power button on the Framemeister remote (green lights indicate turned on).
- 2. Insert the disc into the Wii system, which turns it on.
- 3. Turn on the TV and switch the input to HDMI2 - Game (non-120hz, Standard signal format).
- 4. If you do not see the blue screen, press 1 on the HDMI Switch remote.
- 5. Press CMPNT on the Framemeister remote if you only get audio—and no video (i.e., NO_INPUT).
- 6. Press MENU.
- 7. Scroll down to DATA and then press OK.
- 8. Select LOAD and then press OK.
Note: Do not use LOAD_SELECT - 9. Choose one of the following:
11WIIREG.BIN = Wii output tailored for 480p component signal, 2x vertical scaled, with a 16:9 aspect ratio and smooth edges.
Note: Since the Wii outputs in anamorphic widescreen, you may notice black bars.
Based on 77PS2PBW.
12WIIFUL.BIN = Wii output for
full-stretch scaled 480p anamorphic widescreen (i.e., no black bars).
Based on 16FZGXWP. - 10. Press right and then press OK.
Note: If the game does not display after 2-3 seconds, and it says “NO_INPUT,” then press CMPNT on the Framemeister remote to confirm input.
Reminder: A handful regular Wii games (MadWorld, Data East Arcade Classics) and WiiWare games (Mega Man 9) might benefit from switching to 480i and 4:3.

- 1. Ensure the correct SD Card is inserted in the front of the Wii.
Note: SD Card functionality is not available in the Wii Maintenance Mode (when you hold +/- on Wiimote during Health & Safety). - 2. Press the RED power button on the Framemeister remote (green lights indicate turned on).
- 3. Turn on the TV and switch the input to HDMI2 - Game (non-120hz, Standard signal format).
- 4. If you do not see the blue screen, press 1 on the HDMI Switch remote.
- 5. Turn on the Wii system.
- 6. Press CMPNT on the Framemeister remote if you only get audio—and no video (i.e., NO_INPUT).
- 7. Press MENU.
- 8. Scroll down to DATA and then press OK.
- 9. Select LOAD and then press OK.
Note: Do not use LOAD_SELECT - 10. Choose the following:
11WIIREG.BIN = Wii output tailored for 480p component signal. Works well with Virtual Console.
Based on 77PS2PBW. - 11. Press right and then press OK.
Note: If the game does not display after 2-3 seconds, and it says “NO_INPUT,” then press CMPNT on the Framemeister remote to confirm input. - 12. Set the Wii system to 480i and 4:3 to play Virtual Console games as well as some WiiWare retro titles.
- 13. From the Wii Menu, point at the
SD Card logo in the lower left corner and press A on the Wii Remote to open the SD Card Menu.
Reminder: You may want to play 8- and 16-bit Virtual Console games using the Wii’s secret 240p option.
Wii’s 480p/480i Resolution and
16:9/4:3 Aspect Ratio
Regular Wii | Wii Virtual Console
- 1. From the Wii Menu, point at the Wii button in the lower left corner and press A on the Wii Remote to open the Wii Options.
- 2. Point at Wii Settings on the right and then press A.
- 3. Point at Screen and then press A.
- 4. Point at Widescreen Settings and then press A.
- 5. Choose one of the following:
- ▪ Widescreen (16:9) - Regular Wii
- ▪ Standard (4:3) - Wii VC Games
- 6. Point at Confirm and then press A.
- 7. Point at TV Resolution and then press A on the Wii Remote.
- 8. Choose one of the following:
- ▪ EDTV or HDTV (480p) - Regular Wii
- ▪ Standard TV (480i) - Wii VC Games
- 9. Select Back three (3) times.
Wii VC 240p Mode
Regular Wii | Wii Virtual Console
Note: With Virtual Console, Sega titles, NES titles, and SNES titles can output in a non-interlaced 240p progressive scan video signal, just like the original hardware. This can make the VC games look sharper on HDTVs.
However, because certain TV models/ manufacturers did not support 240p over a component video connection, Nintendo updated the Wii to force the Virtual Console emulator to output 480i instead of 240p non-interlaced mode (double strike) by default.
Turn 240p over component back on with these steps:
- 1. Ensure the correct SD Card is inserted and turn on the Wii system.
- 2. Set the Wii system to 480i and 4:3, as 240p setting does not work when using Wii’s 480p output.
- 3. Point at the SD Card logo in the lower left corner and press A on the Wii Remote to open the SD Card Menu.
- 4. Start a Virtual Console game.
- 5. Press the Home button on the controller for the Wii HOME Menu.
- 6. Select Operations Guide from the HOME Menu.
- 7. Attach a Nunchuk controller to your Wii Remote (if you have a Classic Controller is plugged in, you'll have to remove it).
- 8. Press A+1+Z simultaneously (A and 1 are on your Wii Remote and Z is on the Nunchuk) to turn on 240p mode.
- 9. You should hear a “ding” confirming that you've done this correctly.
To switch back to 480i mode for Virtual Console, you need to press A+2+Z simultaneously. Again, a quick “ding” indicates success.
Note: Although your TV and Framemeister can handle 240p, you will notice a brief delay when switching between 480i and 240p resolutions, such as when you press Home button on the Wii controller.